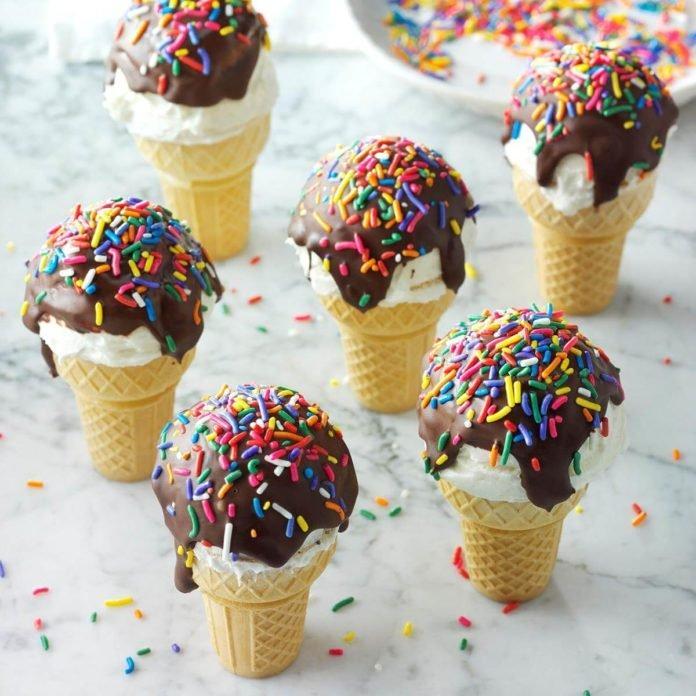
Looking for a fun and creative way to enjoy cupcakes and ice cream at the same time? Look no further than chocolate-dipped ice cream cone cupcakes! These delightful treats are the perfect combination of moist and fluffy cake, creamy ice cream, and rich chocolate. Plus, they're so much fun to make and decorate!
To get started, you'll need to gather your ingredients. You'll need cake mix, eggs, oil, ice cream cones, ice cream, chocolate chips, and sprinkles. You can choose any flavor of cake mix and ice cream that you like, and you can also customize your toppings to suit your taste.
Once you have your ingredients, you can start making the cupcakes. Begin by preheating your oven and preparing the cake mix according to the instructions on the box. Then, spoon the batter into the ice cream cones, filling them about three-quarters of the way full. Place the cones in a muffin tin to keep them upright, and bake them in the oven for about 15-20 minutes, or until a toothpick inserted into the center comes out clean.
Once the cupcakes are done baking, remove them from the oven and let them cool completely. Then, scoop a spoonful of ice cream onto the top of each cupcake, filling the cone to the top. Place the cupcakes in the freezer for at least 2 hours, or until the ice cream is firm.
Once the ice cream is firm, it's time to dip the cupcakes in chocolate. Melt the chocolate chips in a double boiler or in the microwave, stirring frequently until smooth. Then, carefully dip each cupcake into the chocolate, using a spoon to coat the top of the ice cream and cone. Place the cupcakes back in the freezer for a few minutes to let the chocolate set.
Finally, it's time to decorate! You can use any type of sprinkles or toppings that you like. Some fun ideas include crushed nuts, crushed cookies, candy pieces, or even fresh fruit. Just sprinkle your toppings over the top of the chocolate, and then place the cupcakes back in the freezer for a few minutes to let the toppings set.
Ingredients
- 1 package French vanilla or yellow cake mix (regular size)
- 24 ice cream cake cones (about 3 inches tall)
- FROSTING:
- 1 cup butter, softened
- 1/2 cup shortening
- 6 cups confectioners' sugar
- 1/4 cup 2% milk
- 2 teaspoons vanilla extract
- GLAZE:
- 4 cups (24 ounces) semisweet chocolate chips
- 1/4 cup shortening
- Colored sprinkles
Directions
- Preheat oven to 350°. Grease 24 mini-muffin cups. Stand ice cream cones in additional mini-muffin cups.
- Prepare cake mix batter according to package directions. Fill each greased muffin cup with 1 tablespoon batter. Divide remaining batter among ice cream cones (scant 2 tablespoons each).
- Bake until a knife inserted in center comes out clean, 15-20 minutes. Cool in pans 5 minutes. Transfer both plain and cone cupcakes to wire racks; cool completely.
- For frosting, beat butter and shortening until blended. Gradually beat in confectioners' sugar, milk and vanilla on medium speed until soft peaks form.
- To assemble, spread a small amount of frosting on bottom of each plain cupcake; attach to top of a cone cupcake. Spread remaining frosting over top cupcakes, rounding tops to resemble a scoop of ice cream. Freeze until frosting is firm, 5-10 minutes.
- For glaze, in a large metal bowl over simmering water, melt chocolate and shortening, stirring until smooth. Dip tops of cones in chocolate mixture. Decorate with sprinkles. Let stand until set.
And that's it! These chocolate-dipped ice cream cone cupcakes are sure to be a hit with kids and adults alike. They're the perfect way to enjoy the best of both worlds – cake and ice cream – in one delicious treat. So why not give them a try today?


Source: https://www.tasteofhome.com/


